Monday 30 December 2013

CND Shellac Christmas Nail Art - #10 The Reinvented French


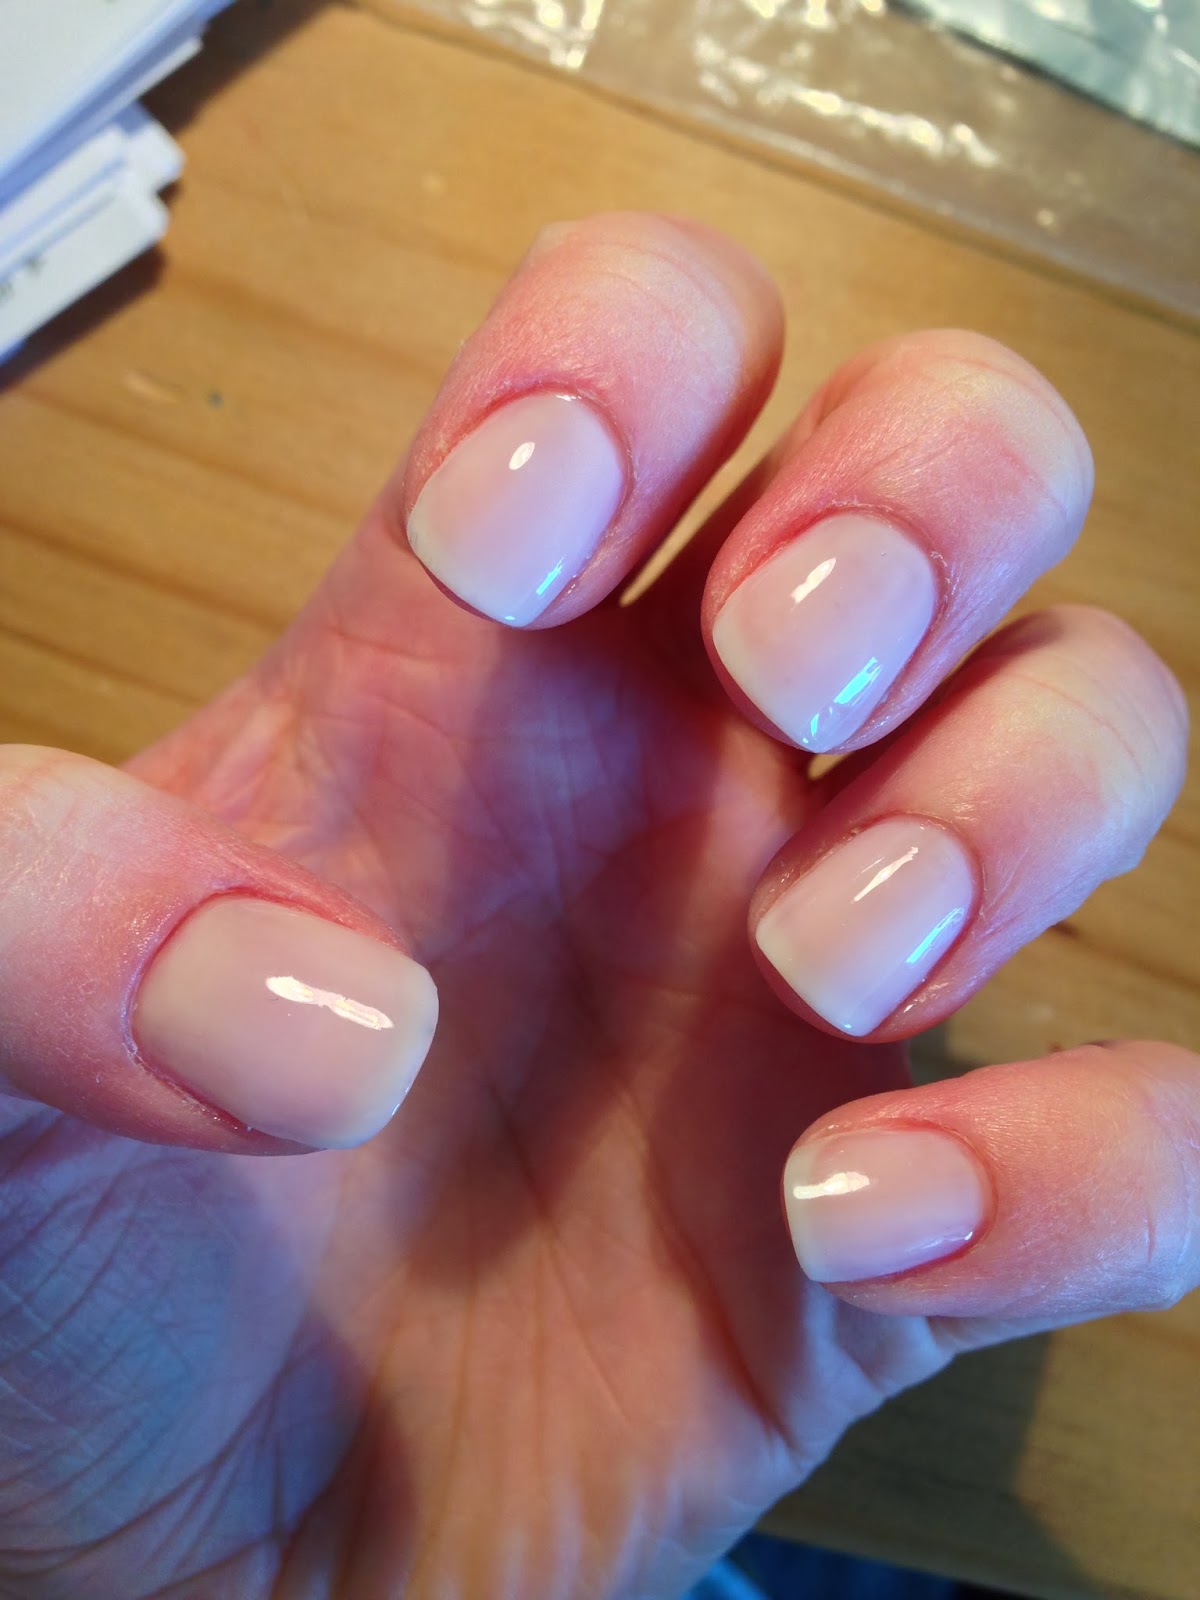
And it's the last Christmas manicure of the season. Simple yet effective with a reinvented french manicure for Jene. She opted for a simple clear, nude base and two suitably festive colours on her tips.

I used one coat of Negligee for the base colour (after base coat) and then with a bit of striping tape help, I created a diagonal along one edge with Sugared Spice. Make sure you remove the tape before curing! I did three coats of the Sugared Spice in the end - the second two coats I did freehand once the tape had given me a nice clean edge to work from. I then repeated the process, three coats, in Tinted Love on the other side of each nail. As you can see in the top photo, I alternated the colours on each hand - like a mirror image.

Subtly Christmassy don't you think? Next up is New Year's nails.... oh how 2013 has flown by!
Disclaimer - I purchased all the products used for this manicure myself, and if you want more info about myself and CND Shellac then check out my disclaimer page here. What's not to like about nail art that actually lasts?!

CND Shellac Christmas Nail Art - #9 Turquoise Trinkets


Yup. Turquoise was most definitely the colour of choice this month. Much like Kate's manicure here, Stacey was completely taken with the green sparkle and opted for the same glitter but a slightly different design for her Christmas nails.

The lace effect on Stacey's ring fingers and thumbs (not pictured) were a design that I spotted on Lindsey's instagram (@wondrouslypolished) - you can check out her full blog post on her design, plus the more intricate thumb detail she did, here.

photo from @wondrouslypolished on instagram
To recreate this in CND Shellac, I painted all nails with one coat of Hotski to Tchotchke. I then added another two coats to the ring finger and thumb (it's just slightly too sheer in only two coats I think) and added two coats of a turquoise glitter paste to all other fingers. The turquoise glitter paste was made up of Mother of Pearl and Gosh Nail Glitter in 09 Turquoise. I then added top coat to all fingers and cured.

Now for the important bit, to create the lace pattern on the ring finger/thumb, do not remove the tacky layer! Using a brush, buff the CND Additive Pigment Effect in Blush Bronze Frost into the tacky layer, completely covering the nail and don't worry if you make a little mess around the cuticles. Then using top coat and a small detailer brush, paint the lace pattern on top. I used a dotting tool to add the dots, but be very careful to not accidentally scratch off the pigment that's stuck to the tacky layer. Cure the top coat pattern and after this final cure, remove the tacky inhibition layer - this will remove all the excess pigment that's not been sealed into the pattern.

Ta dah! What do you think? The additive is actually a lot more rose gold than bronze as pictured, it worked so well with the turquoise. I love this technique and can't wait try out some more pigments in this way. Take a look at www.chickettes.com for some more inspiration, especially her video here - I can't wait to give rainbow polka dots a go...
Disclaimer - I purchased all the products used for this manicure myself, and if you want more info about myself and CND Shellac then check out my disclaimer page here. What's not to like about nail art that actually lasts?!

CND Shellac Christmas Nail Art - #8 Rudolph and Gingerbread Men

It seems that Ruby Ritz well and truly made a comeback this season. With its re-release as part of a duo with Wildfire it was a natural choice for many to get that glitzy Christmas manicure - including myself!

Natalie took one look at my manicure and decided that was the colour for her, but she one step further and challenged me to some appropriately festive characters...


These two, adorable, designs were inspired by a couple of google images that Natalie had found. After a bit more research, I found the sweet little gingerbread man stitched to this cute cushion from Miss Shelley Designs at notonthehighstreet.com.

Gingerbread Man Cushion from notonthehighstreet.com £25
And Rudolph is actually a tutorial from the talented Joya's tumblr page (aka Blanket Print Nails). You can see here full post here.

tutorial by Joya at blanketprint.tumblr.com
To recreate this manicure in CND Shellac I used:

Red nails - one coat of Red Baroness followed by one coat of Ruby Ritz
White base colour for the characters - two coats of Studio White followed by one coat of Silver VIP Status
(the light brown used for the gingerbread man and Rudolph is made from a mixture of Faux Fur and Cocoa)
Gingerbread man - two coats of the light brown mixture in the shape of the gingerbread man, then use a dotting tool to add eyes in Faux Fur and buttons in Cream Puff, then the bow tie is one like the red base colour on the other nails (Red Baroness and Ruby Ritz)
Rudolph - follow the tutorial above (making sure to cure between each colour application) using the light brown mix for Rudolph, Faux Fur for the antlers, Cream Puff and Blackpool for the eyes, Red Baroness and Ruby Ritz for the nose.

All nails were finished with a layer of top coat and voila! What do you think? I can't decide if Rudolph or the Gingerbread man is my favourite...


Disclaimer - I purchased all the products used for this manicure myself, and if you want more info about myself and CND Shellac then check out my disclaimer page here. What's not to like about nail art that actually lasts?!

CND Shellac Christmas Nail Art - #7 Charmed Collection Dotticure

Back in October I posted about the new CND Shellac limited edition Christmas 'Charmed' collection and as I'm sure you all guessed, it didn't take me long to add them to my stash! Then the perfect opportunity came to try them all out.... Check out these beauties:


This is Maddie and her Christmas manicure of choice for 2013 or should I say 'dotticure'. We were inspired by a design from Hannah at The Nail Trail that she did in OPI nail polish (I think!):

photo from @thenailtrail on instagram
Although I can't find the design on her website, it was on her instagram (@thenailtrail) and you can find the exact post here or here.

To recreate this in CND Shellac we managed to use the entire Charmed collection, plus a few others:
The base colour is two coats of Studio White followed by one coat of Silver VIP Status.
The dots for the Christmas tree are Frosted Glen and Serene Green and the dots on the other nails are Frosted Glen, Serene Green, Scarlet Letter, Ice Vapor and Tinsel Toast. To create the different sized dots I used two different dotting tools - the Orly Dotter Duo and CND dotting tool that came with the original additives kit.
To the top of each Christmas tree I added silver star glequin from the Born Pretty Store and I finished off by adding top coat.


This is hands down, one of my favourite (if not the favourite) Christmas designs so far! What do you think?
Disclaimer - I purchased all the products used for this manicure myself, and if you want more info about myself and CND Shellac then check out my disclaimer page here. What's not to like about nail art that actually lasts?!

CND Shellac Christmas Nail Art - #6 Turquoise Twinkle


The glitter's out in full force for this one (and turquoise was quite a popular colour choice this year too it seems). Kate's request was for a little Christmas art, so she decided on a tree and a present design for the middle and ring fingers and the thumb (not pictured) whilst her first and little finger were just glitter.

For the first and little fingers I used 2 coats of Hotski to Tchotchke and then 2 coats of a turquoise glitter paste - I mixed together Mother of Pearl and some Gosh Nail Glitter in 09 Turquoise.

The thumb, middle and ring fingers were a little more tricky! As Kate wanted a gold glitter detail, I decided to use an engraving effect that I had seen used before by Holly Schippers (Fingernailfixer). I applied 2 coats of Tinsel Toast, then after curing, added 1 coat of Hotski to Tchotchke. Before curing this, I used a dotting tool to engrave the pattern I wanted on each nail and once happy I then cured that coat. I then used 1 coat of the turquoise glitter paste from the other nails to go over the nail art, re-engraved the pattern, cured again and then finished with top coat.

A little tricky but I like the overall effect of the engraving, I think I might have a little play around with that technique...

Most Gosh Nail Glitters are available from Superdrug in the UK for £4.99 (only the 02 Gold is online, the other colours are all in store).

What do you think?

Disclaimer - I purchased all the products used for this manicure myself, and if you want more info about myself and CND Shellac then check out my disclaimer page here. What's not to like about nail art that actually lasts?!

CND Shellac Christmas Nail Art - #5 French and Gold

The festive season called for many a glittery mani and I thought I best get my butt in gear to show you some of the designs I've done for various Christmas manicure requests. If you follow me on instagram then you will have spotted the pictures in the next few posts already, so apologies for the repeats!


A classic French manicure I could probably do with my eyes closed (well not exactly, but you get my drift!) so those who are partial to a nice crisp white tip often opt for a bit of glitter to spice it up for Christmas. Typically gold or silver is most requested, and above is the gold version. I do a french manicure as normal (above is 1 coat of Negligee and 2 coats of Cream Puff) and then paint on a glitter line with a fine detailer brush, before finally adding top coat.

For the gold - mix up a glitter paste of Tinsel Toast and some Gosh Nail Gitter in 02 Gold to give the glitter a bit more 'oomph'. You could also use Gold VIP Status as a mixer if you wished.

To make a silver - mix up a glitter paste of Silver VIP Status or the new Ice Vapor with some Gosh Nail Glitter in 01 Silver.

For other glitter colours, you could also use Zillionaire or Mother of Pearl as a mixer. Most Gosh Nail Glitters are available from Superdrug in the UK for £4.99 (only the 02 Gold is online, the other colours are all in store).

Enjoy!

Disclaimer - I purchased all the products used for this manicure myself, and if you want more info about myself and CND Shellac then check out my disclaimer page here. What's not to like about nail art that actually lasts?!

Wednesday 4 December 2013

CND Shellac Open Road Collection Spring 2014

So I've yet to even purchase the four Intimates or the limited edition Christmas Charmed colours, and the Spring 2014 collection is already hitting the shelves.... today in fact if you're in the UK!


From left to right we have:

Clay Canyon - a nude-beige clay colour
Desert Poppy - cream orange coral with a hint of shimmer
Mint Convertible - pale 'mint choc chip' pastel green
Powder My Nose - a new nude, the perfect foundation colour
Sage Scarf - a neutral sage green
Sun Bleached - a heavenly pale pastel yellow
Photo courtesy of the SweetSquared facebook page here
And can I just say, Hallelujah!! A yellow... finally! Most people seem excited about the yellow and the coral/orange but many have criticised the launch of more greens. Even though I agree we're on a bit of a green overload at the minute, I actually don't mind too much as the Shellac range definitely lacks in this area.


And to tempt us even more, CND are launching another additives set to go with this collection.

The set consists of one glitter - Denim Geode - and four pigment effects - Emerald Mirage, Amethyst Flash, Copper Mine, and Desert Chameleon. I cannot wait to get my hands on that last one, it looks like it might leave a duo-chrome-like finish... oh the possibilities!!

I think the purse strings are going to get a little stretched before I see out 2013...
Disclaimer - Photos are not my own, they are courtesy of CND and the SweetSquared facebook page here

Saturday 16 November 2013

CND Vinylux Review

As you are more than aware, my Shellac obsession has been strong for the last two years. I have yet to convert my sister though who finds herself bored with a manicure after a few days, a week at most. So when CND Vinylux was launched, she jumped on the bandwagon and of course I had to give it a go to see if 7-day wear really was as true as it claimed.


CND Vinylux is a nail polish colour and top coat system that:
  • is 5-free
  • requires no base coat
  • does not stain the nail
  • lasts for 7 days - thanks to the top coat that gets stronger the more it is exposed to UV light
  • dries in 8½ minutes - really!!
I have to admit, the dry time was the biggest selling point for me, but I also really wanted to see how it compared to Shellac in longevity. I obviously knew that it would not be as hardwearing and I honestly thought that there was no way it would last 4 days on me, let alone 7, without any chipping.

So I borrowed one of my sister's colours - this is Lavishly Loved, a neutral sheer pink/cream - to test it out. I wore two coats of Lavishly Loved followed by the Vinylux Top Coat, and it really does dry in 8½ minutes! I set about my normal working week to see how it fared...

Initial application
After 7 days
After 7 days - close up
As you can see, it was still there after 7 days - yes I had tip wear and the glossy shine had dulled but no chips or breakages at all. I actually couldn't believe it, school is the hardest thing on my nails, so I always wear Shellac for the day job or I'd end up with constant breaks and nubs for most of the time.

I am really impressed with the Vinylux system and kudos to CND for such a revolutionary product! As much as I love the Vinylux system (and glorious colour range) though I will be sticking with my good old Shellac for the time being. I am too lazy to change my nail colour on weekly basis and after being used to applying a gel-polish to my nails for so long, normal nail polish is a little tricky! My sister however is totally converted and her colour collection is expanding on an almost daily basis at times.

Have you tried out the Vinylux range from CND?

Discliamer - This was my sister's product that I 'borrowed' for review... possibly without her knowledge :) but what's hers is mine and so on... this review is 100% honest and not sponsored or influenced by any other party.

Wednesday 30 October 2013

CND Shellac Nail Art - Halloween Mix'n'Match


Good old Gemma. I can always rely on her to test my nail art capabilities! Her penguin mani from last Christmas is still one of my favourite designs to create (here) so of course this Halloween she went all themed out, with some glitter too of course!

As a base colour I used Asphalt and then I added a dark grey glitter paste to her middle and little finger (made up of Silver VIP Status, Gosh 03 Grey Moonstone and Gosh 01 Silver Nail Glitters). After curing, I painted the cobwebs and spider with Cream Puff and two little Blackpool dots for the spider's eyes.

The little pumpkin (my favourite I think!) was made up of two different glitter pastes. The green stalk was Silver VIP Status and Gosh 08 Emerald Green (not available in the UK) and the pumpkin was Silver VIP Status and Gosh 04 Fire Opal (also not available in the UK). I used a very small dotting tool to create the curved vertical lines down the pumpkin before I cured the glitter, then after curing used some Blackpool to add the eyes and mouth.

On her thumb, she simply had the orange glitter paste used for the pumpkin.
 

Most Gosh Nail Glitters are available from Superdrug in the UK for £4.99 (only the 02 Gold is online, the other colours are all in store). Although two of the colours here I had to purchase from the states as they never released them here.

Disclaimer - I purchased all the products used for this manicure myself, and if you want more info about myself and CND Shellac then check out my disclaimer page here. What's not to like about nail art that actually lasts?!

Saturday 26 October 2013

CND Shellac Intimates Collection 2013

Back in August you may have seen my Forbidden collection post that mentioned the new Fall colours for 2013 and a brief look at some new nudes set to join the ever expanding Shellac catalogue.

Well they are finally here. This is the Intimates collection and they have some pretty interesting names which make your google searches seem much more risque!

Photo from Blog Me Beautiful
Photo from Blog Me Beautiful
From Left to Right we have:
Blush Teddy - opaque iridescent light pink
Nude Knickers - semi-sheer light nude opaque
Bare Chemise - semi-sheer light nude
Satin Pajamas - opaque taupe beige

In all a gorgeous set of romantic shades - that will look amazing alone or with some pearl/glitter nail art! Now to get my mitts on these lovelies...


Disclaimer - Photos are not my own, they are courtesy www.blog-me-beautiful.com

New CND Shellac Christmas Charmed Collection 2013

Ah the holiday season is almost upon us! And what better way to get into the festive spirit than with a suitably seasonal manicure?

Introducing the new CND Shellac Charmed collection:


From Left to Right we have:
Frosted Glen - a metallic sage green
Scarlet Letter - a bright scarlet red
Ice Vapor - a shiny silver glitter
Serene Green - a rich festive green

Photo from Blog Me Beautiful
As for a release date - around late October or early November seems likely. And make sure you stock up as these are rumoured to be limited edition again like last year. Oh, and good news! They are also re-releasing the popular Ruby Ritz from last years limited edition duo (here) in early November - rumour has it this may well end up a permanent member of the colour collection!


Now Christmas wouldn't be complete without some new additives thrown into the mix! So to join the 4 new colours CND are also releasing 4 limited edition additives in Silver Frost, Gilded Gleam, Blush Bronze Frost and Icicles.

For some great swatches check out LiverpoolLashes.blogspot.com - she's done some fab swatches of the additives over Blackpool.


Disclaimer - Photos are not my own, they are courtesy of the CND press release here and www.blog-me-beautiful.com

Sunday 13 October 2013

Superdry Nail Paint in Punk Pink


Yesterday I posted about a the new Superdry Beauty range, in particular the Bento Beauty-Box, on Brush Up and Make-up!

In this gift set came a gorgeous little polish, a Superdry NailPaint in the prettiest fuschia, Punk Pink. Well you know by now that it's rare I wear 'normal' polish on my fingers but I couldn't resist this perfectly bright shade. I slapped it on quickly over a clear nude base of Shellac, so that it didn't affect the colour but my nails still had strength.

One coat gave pretty good coverage but to be truly opaque two coats would be better. It dried really quickly and I love that it's also very glossy without topcoat - but to extend wear time and shine I highly recommend a quick slather of Seche Vite over the top.


This colour came as part of the new Bento Beauty-Box (£25) launched later this month, but other Nail Paint colours are available now in Superdry Stores and online.
Disclaimer - This product was given to me as a PR sample for my consideration and review. The above review is 100% honest and of my own, unbiased opinion.

Sunday 25 August 2013

New CND Shellac Colours for Fall 2013!

This month saw the release of the new CND Shellac Fall 2013 collection - or the 'Forbidden' Collection as it's been called.

From left to right we have:
Blue Rapture - a muted, opaque blue
Burnt Romance - opaque, deep orange-brown
Dark Dahlia - deep, dark purple-red
Night Glimmer - dark, 'steel, grey shimmer
Steel Gaze - molten liquid polish, a gold and silver dark grey shimmer
Tinted Love - opaque dark fuchsia

And as soon as I give in and purchase the full collection, I will get working on some nail art with these for your viewing pleasure! In the meantime, here's some swatches from SweetSquared:

Swatches from L to R: Dark Dahlia, Night Glimmer, Steel Gaze, Tinted Love, Burnt Romance and Blue Rapture
The 6 new colours add to the 9 already released this year in the 'Sweetdreams' and 'Summer Splash' ranges to bring the total to 15. But rumour has it there are four more to come....

Yes indeed! And if rumours are to be believed, which inevitably they always are until proven otherwise, the new 4 are a small nude range called the 'Intimate' Collection. It took me bloody ages to find this picture:
Now I've heard a lot of debate over the names, but from what I've read so far they seem to be given as (from L-R) Blush Teddy, Nude Knickers, Bare Chemise, and Satin Pyjamas. If I'm not mistaken though, and if you too read carefully, it actually looks like the last one is Bare Chemise and the third is called Silk Stockings??!

I've even read a supposed release date of 1st November too (www.dailynails.com) -  but seeing as the Forbidden Collection was early, maybe we'll find these creeping out a bit sooner aswell?

Oh and don't even get me started on the 2 rumoured Limited Edition Christmas colour duos for late 2013! (www.thevillageretreat.co.uk)
Disclaimer - Photos are not my own, they are courtesy of www.reviveholisticbeauty.com and the SweetSquared facebook page.
Related Posts Plugin for WordPress, Blogger...